Lead inspections are essential for identifying lead-based hazards, particularly in older homes. In New York City, landlords of pre-1960 buildings must comply with strict lead laws to ensure tenant safety. Proper preparation can streamline the inspection process, help you meet legal requirements, and reduce potential lead exposure risks. If you’re preparing for a lead inspection in NYC, taking the right steps beforehand can save time and prevent costly delays.
In this blog, we will walk you through everything you need to do before an inspector arrives, from clearing access points to understanding legal requirements.
Steps On How To Prepare For Lead Inspection
Understand NYC Lead Inspection Requirements
New York City has stringent lead safety laws, including Local Law 1, which requires landlords to inspect rental units for lead hazards annually if children under six reside there. These laws aim to reduce lead exposure, as even low levels can pose significant health risks. Homeowners should familiarize themselves with these regulations to ensure compliance and avoid penalties.
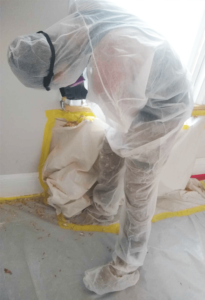
Inspections typically involve X-ray fluorescence (XRF) testing to detect lead-based paint, along with dust wipe sampling to check for lead-contaminated dust. Knowing what to expect allows you to prepare adequately and address any concerns before the inspection takes place.
Declutter and Clean Affected Areas
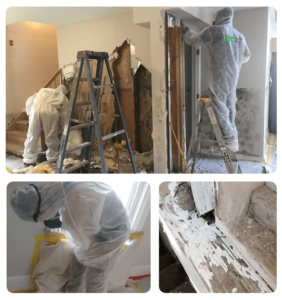
Inspectors need clear access to walls, windows, doors, and surfaces where lead-based paint may be present. Clutter, furniture, and personal belongings can obstruct these areas, making the inspection process more difficult. Moving items away from walls and ensuring proper lighting can help the inspector perform a thorough assessment.
Additionally, cleaning surfaces before the inspection is crucial. Lead dust can accumulate on floors, window sills, and baseboards, affecting test results. Use a HEPA-filter vacuum and damp cloths to remove dust, as regular sweeping can spread lead particles instead of eliminating them.
Identify High-Risk Areas in Your Home
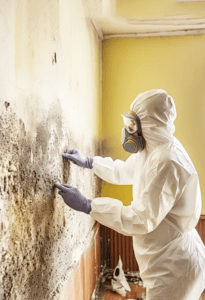
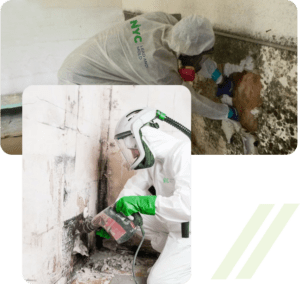
Lead-based paint was commonly used in homes built before 1978, with high-risk areas including window frames, doors, railings, and moldings. If you notice peeling or chipping paint, it may indicate a potential lead hazard. Addressing minor deterioration before an inspection can help you avoid a failed report.
Check for signs of lead hazards in frequently used spaces, especially where young children may come into contact with contaminated dust. If previous renovations involved sanding or scraping painted surfaces, lead particles may still be present, requiring professional cleaning or remediation.
Also Read: Lead Testing 101: How It Works and What You Need to Know
Notify Residents and Plan Ahead
Lead inspections often involve dust sampling and specialized testing, which can take several hours. If you share your home with tenants, family members, or pets, notify them in advance so they can plan accordingly. This helps prevent disruptions and ensures a smoother inspection process.
For properties with tenants, compliance with NYC lead laws may require their cooperation. Informing them about the inspection ahead of time can help maintain a positive relationship and ensure necessary access to all areas being tested.
Gather Essential Documents
Having relevant documentation ready can speed up the inspection and prevent unnecessary delays. Inspectors may request past reports, lead hazard disclosures, renovation permits, and maintenance records. Keeping these documents organized and accessible ensures a smoother process.
If your home has undergone previous lead testing or abatement work, providing these reports can help inspectors understand the history of lead hazards in the property. This documentation may also be required when selling or renting out your home, ensuring compliance with NYC regulations.
Ensure Safe Access for Inspectors
Inspectors need to assess all areas of the home, including basements, attics, and crawl spaces where lead-based hazards might exist. Ensuring doors are unlocked and stairways are clear of obstructions allows for a thorough examination. If certain areas require special keys or access codes, have them ready beforehand.
Additionally, make sure that any ongoing construction or maintenance work does not interfere with the inspection. If repairs are in progress, consider scheduling the inspection after work is completed to avoid disruptions and ensure accurate test results.
Follow Up on the Results
After the inspection, review the report carefully to understand any potential lead hazards identified. If lead is detected, necessary steps may include encapsulation (sealing lead paint), repainting, or full abatement to remove lead-based materials. Addressing these issues promptly is crucial to maintaining a safe home environment.
If the inspection confirms that your home is lead-safe, keep a copy of the report for future reference. This documentation can be valuable for rental compliance, home sales, or insurance purposes, ensuring that you meet all necessary safety standards.
Also Read: How to Safeguard Your Family During a Lead Inspection
Need Help With a Lead Inspection in NYC?
Preparing for a lead inspection in NYC doesn’t have to be complicated. NYC Lead & Mold provides expert lead testing services to help homeowners and landlords stay compliant with local regulations. Our certified inspectors offer thorough assessments and actionable solutions to ensure your property is lead-safe.
Safeguard your home—contact us today to schedule an inspection!